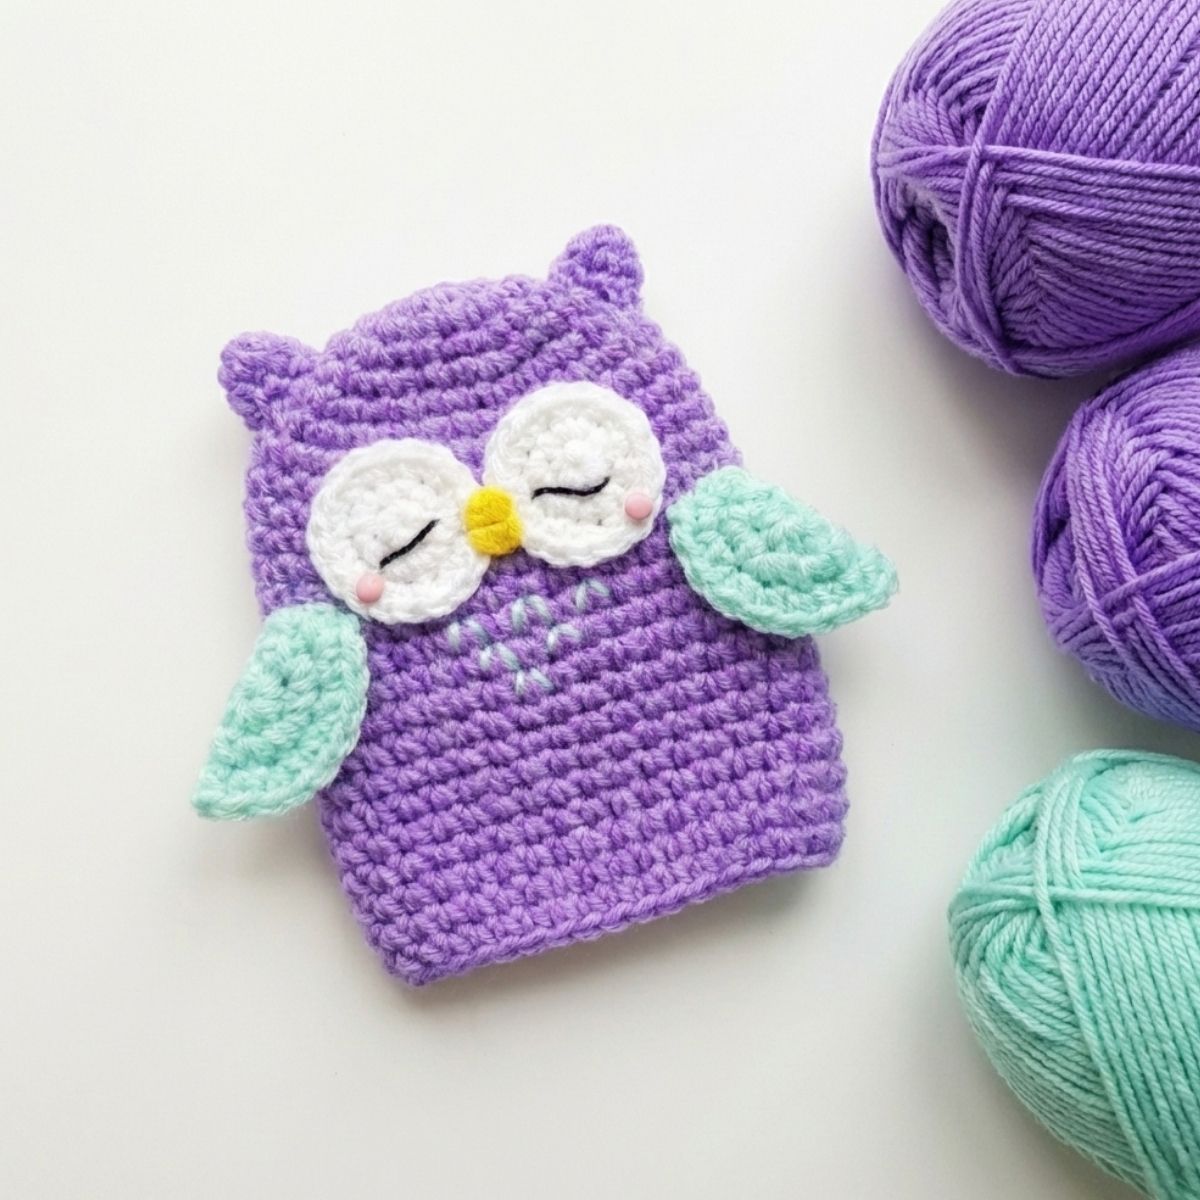
I want to introduce you to Mr. Murasaki, a sleepy little purple owl amigurumi that I absolutely adore. Murasaki means purple in Japanese, and this tiny crochet owl amigurumi perfectly lives up to his name. He is only about 3 inches tall, quick to make, and has the most charming half-closed eyes that give him so much personality. If you are looking for a fun and beginner-friendly amigurumi crochet pattern, this little guy is a great place to start.
Materials and Tools
Here is everything you need to crochet your own Mr. Murasaki:
Yarn:
- Acrylic yarn in purple (main color for the body and ears)
- Acrylic yarn in cyan (for the wings and belly details)
- Acrylic yarn in white (for the eyes)
- Black crochet thread (for the eyelid embroidery)
Other supplies:
- 2 x 4mm pink brad pins (for the cheeks)
- Yellow felt (for the beak)
Tools:
- 3mm crochet hook
- Darning needle (tapestry needle)
- Polyester fiberfill for stuffing
- Scissors
- Pins (for positioning pieces before sewing)
Gauge and Finished Size
The finished owl measures approximately 3 inches tall when stuffed. Gauge is not critical for this project. What matters most is that your stitches are tight enough so the stuffing does not show through. If your tension is looser, you may want to go down a hook size.
Pattern Notes
Mr. Murasaki is crocheted in continuous spiral rounds. You do not join at the end of each round. Use a stitch marker to keep track of the beginning of each round.
The body is worked from the bottom up, stuffed, and then closed. The eyes, wings, and ears are made separately and sewn on during assembly.
This pattern is beginner-friendly. If you are new to amigurumi, the most important technique to practice is the invisible decrease, which gives a much neater finish than a standard decrease.
Abbreviations
- Ch – chain
- Sc – single crochet
- Dc – double crochet
- Inc – increase (2 sc in the same stitch)
- Inv dec – invisible decrease
Special Stitches
Invisible Decrease (Inv dec): Insert your hook through the front loop only of the next stitch, then through the front loop only of the stitch after that. Yarn over and pull through both loops on the hook, then yarn over and pull through the remaining two loops. This creates a much cleaner decrease than the standard method and is essential for a tidy amigurumi finish.
Pattern Instructions
Body
Work with purple yarn.
Round 1: Sc 6 in magic ring. {6} Round 2: Inc in each stitch around. {12} Round 3: (Inc, sc 1) around. {18} Round 4: (Inc, sc 2) around. {24} Round 5: (Inc, sc 3) around. {30} Round 6: (Inc, sc 4) around. {36} Rounds 7 to 18: Sc around. {36} Round 19: (Inv dec, sc 4) around. {30} Round 20: (Inv dec, sc 3) around. {24} Round 21: (Inv dec, sc 2) around. {18}
Stuff the body firmly with polyester fiberfill before continuing.
Round 22: (Inv dec, sc 1) around. {12} Round 23: Inv dec around. {6}
Fasten off and weave in the end, closing the hole completely.
Eyes
Make 2 with white yarn.
Round 1: Sc 6 in magic ring. {6} Round 2: Inc in each stitch around. {12} Round 3: (Inc, sc 1) around. {18}
Fasten off and leave a long tail for sewing.
Once both eyes are done, cut a strand of black crochet thread and sew a diagonal eyelid line across each one. This is what gives Mr. Murasaki his signature sleepy look. Knot off the ends at the back of each eye.
Wings
Make 2 with cyan yarn.
Round 1: Sc 6 in magic ring. {6} Round 2: Inc in each stitch around. {12} Round 3: (Inc, sc 1) around. {18}
Fasten off and leave a long tail for sewing.
Ears
Make 2 with purple yarn.
Round 1: Sc 3 in magic ring. {3} Round 2: Inc in each stitch around. {6}
Fasten off and leave a long tail for sewing.
Assembly
Once all the pieces are crocheted, it is time to put Mr. Murasaki together. Here is how I do it:
Step 1 – Attach the eyes. Pin both white eye circles onto the front of the body and adjust until you are happy with the placement. Sew them on securely using the long yarn tail and a darning needle.
Step 2 – Sew on the wings. Fold each cyan wing piece in half so it forms a semi-circle. Sew them onto the sides of the body, positioning them near the bottom corner of each eye.
Step 3 – Add the belly feather details. Cut a strand of cyan yarn and use your darning needle to embroider a series of upside-down V shapes on the body below the eyes. Sew 3 in the first row, 2 in the second row, and 1 at the bottom. It looks like little feathers and gives Mr. Murasaki so much character.
Step 4 – Attach the ears. Sew the two small purple ear pieces onto the top of the head, one on each side.
Step 5 – Make and attach the beak. Cut a small beak shape from the yellow felt. Cut it in half through the center and glue it onto the spot where both eyes meet, right in the middle of his face.
Step 6 – Add the cheek brads. Glue the two pink brad pins onto the bottom corners of each eye for his little rosy cheeks. This is the finishing touch that makes him look extra adorable.
Tips
Working tight stitches is the key to a neat amigurumi. If your hook feels like it is struggling to get through the stitches, that is a good sign.
When stuffing the body, do it gradually as you close the rounds. Overstuffing can distort the shape, and understuffing leaves it too floppy. Aim for a firm but not stretched result.
For the eyelid embroidery, use a simple straight stitch and angle it slightly so the eyes look half-closed. Even a small diagonal line makes a huge difference to the expression.
If you cannot find pink brad pins locally, you can also embroider small pink circles onto the face with yarn or use any small round pink embellishment you have on hand.
When sewing on the wings and ears, use pins to test placement before committing with the needle. It is worth taking the extra minute to get it just right.
Frequently Asked Questions
What yarn weight should I use for this owl amigurumi pattern? The original pattern uses standard acrylic yarn with a 3mm hook. Light worsted or DK weight yarn works well. If you use a heavier yarn and a larger hook, your finished owl will be bigger than the original 3 inches. One crafter used 8-ply acrylic with a 4.5mm hook and got a finished owl of about 10cm, which is a sweet size too.
Is this crochet owl amigurumi pattern good for beginners? Yes, it is listed as an easy pattern and is a great beginner amigurumi project. The main techniques you need are the magic ring, single crochet, increase, and invisible decrease. If you are brand new to amigurumi, practicing the invisible decrease before you start will make a big difference.
How do I read the stitch counts in parentheses? The number in curly brackets at the end of each round, like {18}, tells you the total stitch count you should have after completing that round. For example, “(Inc, sc 1) around {18}” means you repeat the sequence of one increase and one single crochet all the way around the round, and when you are done you should have 18 stitches total.
What can I use instead of brad pins for the cheeks? If you cannot find brad pins, you can embroider small circles with pink yarn, use flat-back rhinestones, or cut tiny circles from pink felt and glue them on. Any small round pink embellishment will work.
How long does it take to crochet Mr. Murasaki? The pattern takes about 2 hours from start to finish, including assembly. It is a perfect quick project for an afternoon or an evening of crocheting.
I share daily crochet inspiration on Pinterest. Save this article to your Pinterest boards so you can come back to it whenever you are ready to start.


