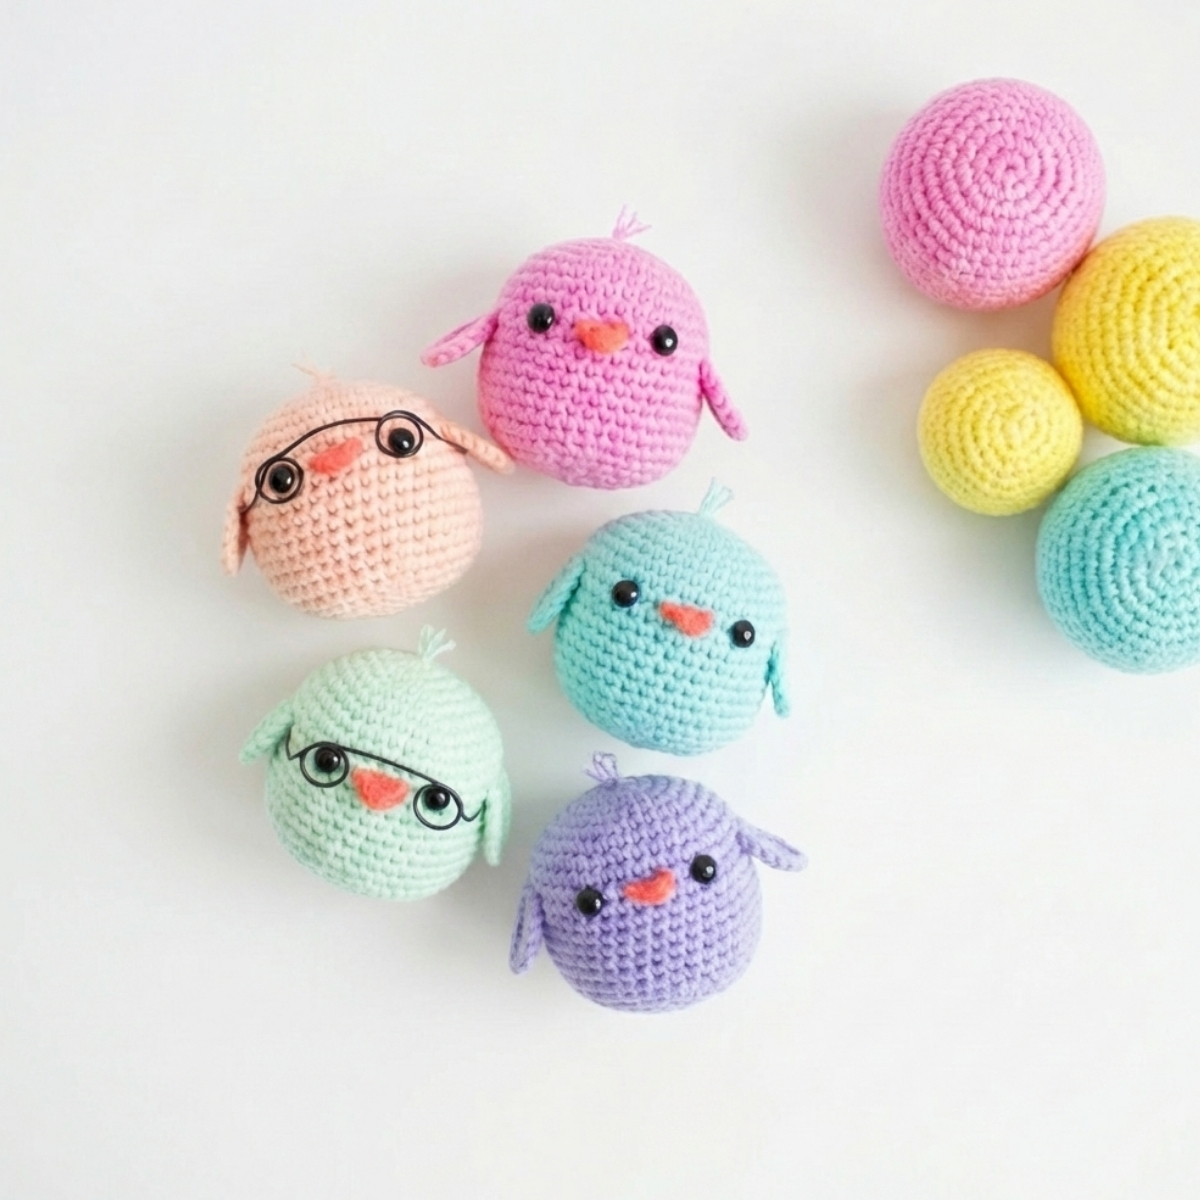
Spring always gets my creative energy going in the best way. All the pastels, the flowers, the color popping up everywhere. It was during one of those inspired moments that I sat down and made these little amigurumi spring chicks, and honestly I fell in love with the whole project. They are so fast and fun to make, and you can crochet them in every color imaginable. Whether you are filling Easter baskets or just want to make the cutest little crochet chick for your shelf, this amigurumi spring chick pattern is the one.
Materials and Tools
Here is everything you will need to make your own amigurumi spring chick:
- Worsted weight yarn (level 4) in the color or colors of your choice. I recommend Loops & Threads Impeccable by Michaels.
- Size E / 3.5mm crochet hook
- 1 pair of 9mm black safety eyes
- Fiberfill stuffing
- Stitch marker
- Yarn needle
- Straight pins
- Scissors
- Optional: 16 gauge black wire for the glasses
A cotton or cotton-blend yarn works beautifully for this project. It gives the chick a nice little structure and the colors really pop.
Gauge and Finished Size
This pattern does not have a specific gauge requirement. The finished chick measures approximately 2.5 inches wide and 3 inches tall. Keep in mind that your finished size may vary slightly depending on your tension, the yarn you choose, and your hook size.
Pattern Notes
This pattern is written using U.S. crochet terminology. The chick is worked in continuous rounds, so you will want to use a stitch marker to keep track of where each round begins. The body is worked from the top down, starting with a magic ring. Safety eyes are added while the body is still open, so do not close it up too early.
If you are making this chick for a small child, I recommend skipping the wire glasses. They are a sweet finishing touch for display purposes but are not child safe.
Abbreviations
- R = Round
- Sc = Single Crochet
- Inc = Increase (2 sc in the same stitch)
- Inv dec = Invisible Decrease
- Sts = Stitches
- Ch = Chain
- Hdc = Half Double Crochet
- Dc = Double Crochet
- ( ) = Total stitch count at the end of the round
- * * = Repeat the instructions between the asterisks as many times as indicated
Amigurumi Spring Chick Pattern Instructions
Body
Using the color of your choice:
R1: 6 sc in magic ring. (6 sts) R2: Inc in each st around. (12 sts) R3: Sc 1, inc 6 times. (18 sts) R4: Sc 2, inc 6 times. (24 sts) R5: Sc 3, inc 6 times. (30 sts) R6: Sc 4, inc 6 times. (36 sts) R7: Sc 36. R8: Sc 5, inc 6 times. (42 sts) R9-18: Sc 42.
After completing R18, add your safety eyes between rounds 10 and 11, placing them 6 stitches apart.
Once the safety eyes are in, take your starting yarn tail and use a yarn needle to weave it up through the center of the magic ring. This creates the cutest little tuft of hair on top of the chick’s head. Trim it to the length you like.
R19: Sc 5, inv dec 6 times. (36 sts) R20: Sc 4, inv dec 6 times. (30 sts)
Begin adding fiberfill now and continue stuffing as you close up the body.
R21: Sc 3, inv dec 6 times. (24 sts) R22: Sc 2, inv dec 6 times. (18 sts) R23: Sc 1, inv dec 6 times. (12 sts) R24: Inv dec around 6 times. (6 sts)
Fasten off and leave a tail to close up the piece. Thread your yarn needle and weave through the front loops of the remaining 6 stitches to cinch them closed. Secure and hide the tail.
Beak
Using a coral or orange color:
Chain 3. Starting in the 2nd chain from the hook, work 1 hdc. Then work 1 dc in the last chain.
Fasten off and leave a tail for sewing.
Use your yarn needle to sew the beak in between the safety eyes, centered on the face. Make sure to sew along the entire bottom edge of the beak so it lays flat against the body. Secure and hide all tails.
Wings (Make 2)
Using the same color as the body:
R1: 6 sc in magic ring. (6 sts) R2: Inc in each st around. (12 sts) R3: Sc 1, inc 6 times. (18 sts)
Fasten off and leave a tail for sewing. Weave in the starting tail with your yarn needle. Use straight pins to position the wings on the body near round 11, one on each side. Sew them in place, secure the tails, and hide all ends.
Optional Glasses
Cut about 12 inches of 16 gauge black wire. Use the safety eyes as a guide for spacing and shaping the frames. Make sure the arms on each side are straight, then gently place the glasses on the chick, being careful not to snag the yarn. If this chick is a gift for a child, skip the glasses entirely.
Tips
Start stuffing the body around round 19 and keep adding as you decrease. It is much easier than trying to stuff a nearly closed piece at the end.
Use straight pins to hold the wings and beak in position before you sew. It makes a big difference in getting a symmetrical, polished look.
The little yarn tuft on top is one of my favorite details. Do not skip it! It adds so much personality to the finished chick.
This pattern works up quickly, which makes it perfect for making a whole group of chicks in different colors. Yellow, lavender, mint, peach. They all look adorable together.
If you are gifting these for Easter, they tuck perfectly into a basket and make a sweet alternative to plastic eggs or store-bought toys.
Frequently Asked Questions
What yarn weight do I use for the amigurumi spring chick pattern? This pattern uses worsted weight yarn, which is a level 4. A cotton-blend yarn works especially well because it gives the chick a nice body and makes the colors look bright and vibrant. Any worsted weight yarn will work though.
What size crochet hook do I need? The pattern uses a size E / 3.5mm crochet hook. Using a hook that is smaller than typical for worsted weight helps create a tighter fabric so the stuffing does not peek through.
How big is the finished amigurumi chick? The finished chick is approximately 2.5 inches wide and 3 inches tall. Your finished size may vary depending on your tension and the yarn you use.
When do I add the safety eyes? You add the safety eyes after completing round 18, placing them between rounds 10 and 11, about 6 stitches apart. It is important to add them before you start decreasing and closing up the body.
Can I make this amigurumi chick for a baby or toddler? Safety eyes are not safe for very young children. If you are making this chick for a baby or toddler, embroider the eyes instead using black yarn. Also skip the wire glasses if you add them.
I share daily crochet inspiration on Pinterest. Save this article to your Pinterest boards so you can come back to it whenever you are ready to start.


